Welcome!

By registering with us, you'll be able to discuss, share and private message with other members of our community.

SignUp Now!

The Print House Part 3- Ender 6 Bed Leveling - Your First Print!

JerBearr

Moderator
Moderator
Joined
Jan 15, 2021
Messages
547
Ender 6 Bed Leveling:

Once you believe you have your bed leveled, you should:

1) download the attached files (you must unzip the attachment), load them to your SD card, and plug your SD card into your printer. Both files attached are calibration models. They are used to access the performance of your printer. If you cannot get both of these models to successfully print, you should not move onto the next step. Being unable to get either of these models to print means that there needs to be further calibration done to your hardware (most likely your bed leveling needs to be performed to a high standard).
2) Spray your printer bed with hair spray (yes like what your wife uses in the morning)
3) Navigate to the "Print" menu on your printer and then click the "xyCalibration" and click print. Please keep a watchful eye on this print for the entire duration. It should only take about 20 minutes. If at ANY time the print "fails" then stop the print immediately. There is a stop button on the screen. If you cant find it pull the power cable.
4) If your print failed, try to level your bed again.
5) Retry the "xyCalibrtation" if it failed the first time.
6) If you were able to successfully print the "xyCalibration" repeat steps 3-5 with the "benchyBoat". The "benchyBoat" will take about 1.5-2 hours to print.


If anything here was confusing at all, PLEASE PLEASE ask me questions. Also, keep in mind I am rushing this part because I am busy BUT I want to get you content so you can finally get a print going!! I will remake Part 3 once I have a camera man....in hopes of making a more easily understandable process video.
 

Attachments

  • files.zip
    1 MB · Views: 11

ChicagoFats

Legendary
Founder
Member
Joined
Dec 1, 2020
Messages
4,663
So I want to start off by saying that Part 3 will be short. It is late and I am still catching up from everything I got behind on from when I went on vacation. Excuses...I know...I apologize! I am also making this short because I want to do a remake of this video when I have @Croot_Overlord as a camera man. It will be much easier for me and because I wont be holding the camera I will likely be able to explain the process a little bit better! I had his help today and ended up not taking it. MY MISTAKE :/

Here is the video:

Once you believe you have your bed leveled, you should:

1) download the attached files (you must unzip the attachment), load them to your SD card, and plug your SD card into your printer. Both files attached are calibration models. They are used to access the performance of your printer. If you cannot get both of these models to successfully print, you should not move onto the next step. Being unable to get either of these models to print means that there needs to be further calibration done to your hardware (most likely your bed leveling needs to be performed to a high standard).
2) Spray your printer bed with hair spray (yes like what your wife uses in the morning)
3) Navigate to the "Print" menu on your printer and then click the "xyCalibration" and click print. Please keep a watchful eye on this print for the entire duration. It should only take about 20 minutes. If at ANY time the print "fails" then stop the print immediately. There is a stop button on the screen. If you cant find it pull the power cable.
4) If your print failed, try to level your bed again.
5) Retry the "xyCalibrtation" if it failed the first time.
6) If you were able to successfully print the "xyCalibration" repeat steps 3-5 with the "benchyBoat". The "benchyBoat" will take about 1.5-2 hours to print.


If anything here was confusing at all, PLEASE PLEASE ask me questions. Also, keep in mind I am rushing this part because I am busy BUT I want to get you content so you can finally get a print going!! I will remake Part 3 once I have a camera man....in hopes of making a more easily understandable process video.
 

Attachments

  • DD70173F-4F3C-430D-9F00-F9E8C7E5FD14.jpeg
    DD70173F-4F3C-430D-9F00-F9E8C7E5FD14.jpeg
    1.2 MB · Views: 3

JerBearr

Moderator
Moderator
Joined
Jan 15, 2021
Messages
547
Working on my leveling now. Unfortunately Im going on a boat trip for the weekend and wont be back until Sunday. Will try to get up to speed then.

Really enjoying the first video, working on my leveling now.
I'm hoping the video makes sense and it isn't as unclear as I think it is. If you are able to successfully level the bed then I might be more clear than I think it is
 

ChicagoFats

Legendary
Founder
Member
Joined
Dec 1, 2020
Messages
4,663
I'm hoping the video makes sense and it isn't as unclear as I think it is. If you are able to successfully level the bed then I might be more clear than I think it is
Not quite to leveling yet. Your video seemed clear, will let you know when I get to the actual leveling.

I turned on to level and since I didn’t have z axis connected properly ran into a little problem. Fixing now
 

JerBearr

Moderator
Moderator
Joined
Jan 15, 2021
Messages
547
Not quite to leveling yet. Your video seemed clear, will let you know when I get to the actual leveling.

I turned on to level and since I didn’t have z axis connected properly ran into a little problem. Fixing now
Gotcha. Makes sense now. Don't over tighten anything and when you get to the leveling, it is better to make 10 passes around that circle (2,5,4,3 I believe is the number order) where you only make very very small adjustments than it is to try and do it all in 1 or 2 passes. As you adjust 1 corner, it will move another corner with it, so you will have to make many passes around making small adjustments to get it perfect. When you're done there's a good chance the center will be too tight to move the paper around, but as long as the corners are as the video suggested, then you should be good to go.
 

ChicagoFats

Legendary
Founder
Member
Joined
Dec 1, 2020
Messages
4,663
Gotcha. Makes sense now. Don't over tighten anything and when you get to the leveling, it is better to make 10 passes around that circle (2,5,4,3 I believe is the number order) where you only make very very small adjustments than it is to try and do it all in 1 or 2 passes. As you adjust 1 corner, it will move another corner with it, so you will have to make many passes around making small adjustments to get it perfect. When you're done there's a good chance the center will be too tight to move the paper around, but as long as the corners are as the video suggested, then you should be good to go.

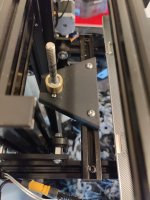
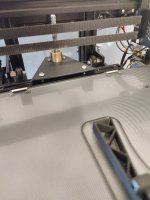
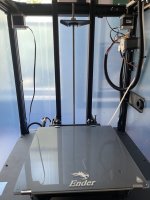
My bed (y-axis) seems to be stuck towards the top. Is there a way to adjust the height of the bed?
 

Cre8ive

Shaping the Future of Reality
Founder
Joined
Jan 12, 2021
Messages
3,441
You can see it’s towards the tip. I went to level and thought it would auto adjust, but it didn’t go lowerView attachment 22454
I wonder how long it will be before the feds start restricting 3D printer purchases and regulate what they can and cannot print. I say this because when something becomes popular with conservatives they want to regulate it.
 

shiv

John
Administrator
Founder
Member
Joined
Dec 1, 2020
Messages
14,151
I wonder how long it will be before the feds start restricting 3D printer purchases and regulate what they can and cannot print. I say this because when something becomes popular with conservatives they want to regulate it.

The answer is not long.
That’s why I wanted to go ahead and get one. And I can guarantee that we are backing up all the “controversial” plans off lines in our little 3D print club we have formed
 

JerBearr

Moderator
Moderator
Joined
Jan 15, 2021
Messages
547
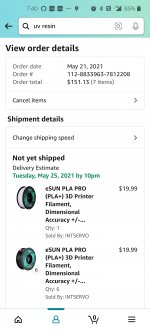
I'll get to the replies shortly. Just want to post this now. Esun pla+ is as cheap as it is going to get. I stocked up....only black because that's what I use for my business. This is also the filament I use for my gun parts, I would highly recommend it. It's only $3 cheaper than usual, but if you plan to make your gun in multiple colors you'll save money. Screenshot_20210521-074009.jpg
 

JerBearr

Moderator
Moderator
Joined
Jan 15, 2021
Messages
547
OK, Im gettting more answers in the video. Missed some earlier. trying again.
OK good. I am a little confused at what you mean by the y-axis is stuck towards the top. If you mean this axis along the long threaded rod in the back of the printer (z-axis) the print bed is supposed to have a "home resting place" at the top of the threaded rod.
 

JerBearr

Moderator
Moderator
Joined
Jan 15, 2021
Messages
547
@JerBearr the boat screwed up in the overhang part, but Hadley is still prouder than heck

View attachment 22455
Hmm it is difficult to see what happened there because it gets grainy zooming in that far. Can you take a picture of the boat by itself? Also I recommend you try to print it again. I wouldn't have expected that kind of a print failure at that point. I think there is a chance the print head got caught on a sliver of extruded filament and then disrupted the print. I suspect it will print correctly.
-----------------------------------
Also...
@Croot_Overlord @ChicagoFats
I think it will be good to schedule a live session where we can all get on discord/skype/whatever and screen share so I can teach you the basics of the "slicer" software Ultimaker Cura. I will be able to give you guys a lot of ready made files, but it will be good for you to learn how to work the software.
 

ChicagoFats

Legendary
Founder
Member
Joined
Dec 1, 2020
Messages
4,663
Hmm it is difficult to see what happened there because it gets grainy zooming in that far. Can you take a picture of the boat by itself? Also I recommend you try to print it again. I wouldn't have expected that kind of a print failure at that point. I think there is a chance the print head got caught on a sliver of extruded filament and then disrupted the print. I suspect it will print correctly.
-----------------------------------
Also...
@Croot_Overlord @ChicagoFats
I think it will be good to schedule a live session where we can all get on discord/skype/whatever and screen share so I can teach you the basics of the "slicer" software Ultimaker Cura. I will be able to give you guys a lot of ready made files, but it will be good for you to learn how to work the software.
Would love this. Can we shoot for next week? Im out for the weekend starting in a couple hours.
 

JerBearr

Moderator
Moderator
Joined
Jan 15, 2021
Messages
547
Would love this. Can we shoot for next week? Im out for the weekend starting in a couple hours.
I am having a cookout on the 29th and there may or may not be people staying at my house the night of the 28th, so next weekend I can only plan for Sunday midday-evening. I am usually free any weekday after 6PM. Just give me a preferred time (same with you @Croot_Overlord) and we can find a good day and time.
 

JerBearr

Moderator
Moderator
Joined
Jan 15, 2021
Messages
547
I printed pikachu again and it worked this time
Awesome! I really need to watch what is happening when it gets towards the top. Nozzle could be snagging the small top layers that are not fully dried yet (which leaves an uneven surface on the print and causing the nozzle to get clogged.....causing a failure). Slowing print time/lowering print temperature/lowering the bed elevation/adding less "squish" can fix this issue. There are many things we can do to combat it if this issue persists. If you continue to have these print failures then it will be bounds to investigate further!
 

ChicagoFats

Legendary
Founder
Member
Joined
Dec 1, 2020
Messages
4,663
@JerBearr I have loaded my filatment? and am trying to print my first item.

When i originally loaded the filament i saw a blue light flash on the filament sensor, so i know its getting power.

However, I load the filament all the way and am still getting the message "No filament: yes to fix or no to cancel"

Having trouble getting it to recognize the filament
 

JerBearr

Moderator
Moderator
Joined
Jan 15, 2021
Messages
547
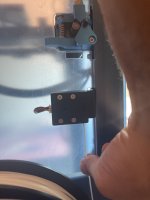
View attachment 23062

CAnt get the wire through the sensor
Sorry for just now seeing this. I've been calibrating my new printer for the last 6 hours!!!

So this is a common issue with these sensors. Did you use the blue flush cut pliers to cut a 45 degree angle in the filament? If not, it will get stuck in the filament run out sensor. Please excuse my bad drawing, but your filament should look like this:
1621914086467.png

If you are still having issues and it wont go through, then you need to pull it out of the sensor and rotate the filament until it will go through. Do not ram it through, but sometimes you can use a little bit of aggression to push it through. I will record a dedicated video to show you what I mean!
 

Latest posts

Top Bottom